Kegel Exercises: Benefits, How To & Results
Master pelvic floor exercises to prevent incontinence and strengthen your pelvic muscles.

What Are Kegel Exercises?
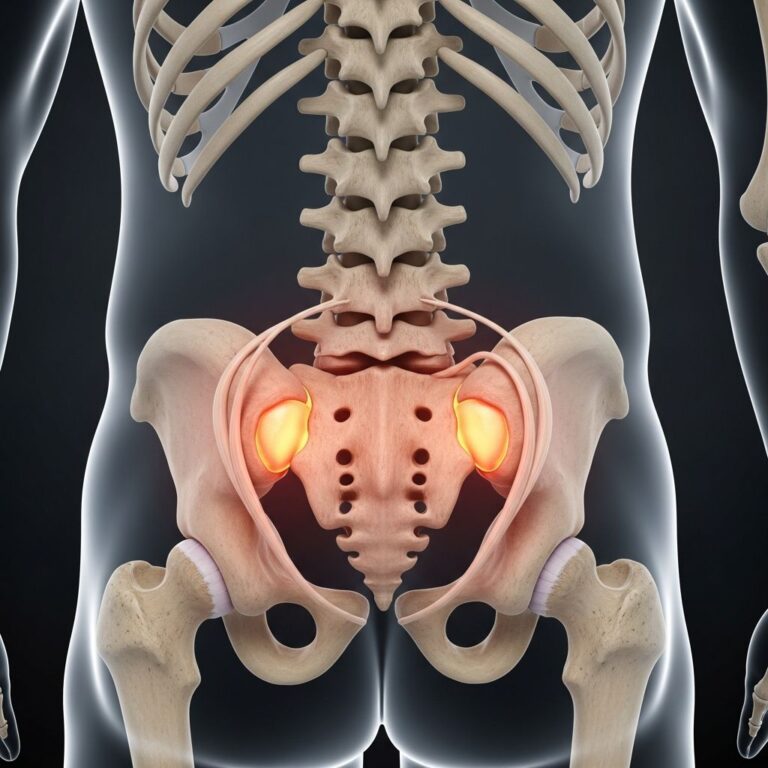
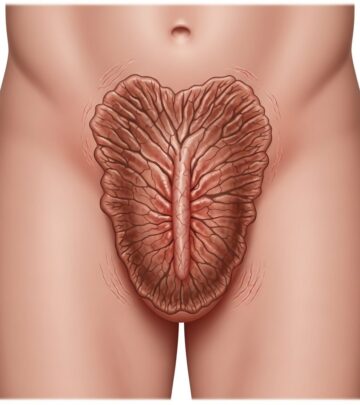
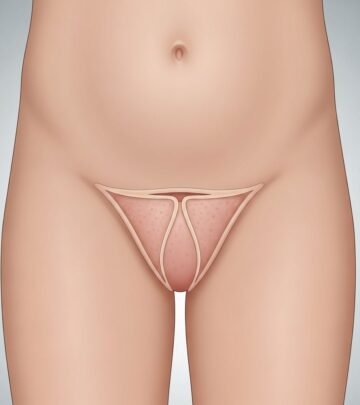
Kegel exercises, also called pelvic floor exercises, are simple yet effective movements designed to strengthen your pelvic floor muscles. Your pelvic floor is a group of muscles located at the base of your pelvis that support critical organs including your bladder, bowel, uterus, and vagina. These muscles play an essential role in maintaining proper bodily functions like urination, bowel movements, and sexual health.
When your pelvic floor muscles weaken—due to aging, pregnancy, childbirth, obesity, or chronic coughing—you may experience embarrassing symptoms like urinary leakage when you laugh, cough, or sneeze. Kegel exercises work by tightening and then releasing these muscles to restore strength and control. The beauty of Kegels is their simplicity: they require no equipment, can be done anywhere, and take just a few minutes daily to perform.
Benefits of Kegel Exercises
Regular Kegel exercise practice offers numerous health benefits that extend beyond just preventing embarrassing leaks. Understanding these benefits can motivate you to commit to a consistent routine.
Primary Benefits
- Prevents and controls urinary incontinence, particularly stress incontinence
- Improves bladder control and reduces the urge to urinate frequently
- Prevents fecal incontinence and reduces gas leakage
- Strengthens muscles that support your uterus, bowels, and bladder
- May improve sexual function and sensation
- Helps prevent pelvic organ prolapse, a condition where internal organs droop into or through the vagina
Kegels are particularly beneficial for women who have experienced pregnancy and childbirth, as these events commonly weaken the pelvic floor. They’re also valuable for women entering menopause, when declining estrogen levels can contribute to pelvic floor weakness.
How to Find Your Pelvic Floor Muscles
Before you can perform effective Kegel exercises, you must identify the correct muscles. Many people initially struggle with this step, but there are several reliable methods to locate your pelvic floor muscles.
Identification Methods
Method 1: Stop-Flow Technique — The most common approach is to imagine stopping the flow of urine mid-stream. Contract the muscles you would use to accomplish this action. You should feel a slight pulling sensation in your rectum and vagina. Once you’ve identified these muscles, you can release the contraction and proceed with your exercises.
Method 2: Stop-Gas Technique — Another way to locate your pelvic floor muscles is to squeeze the muscles you use to prevent passing gas. This method helps many people who find the stop-flow technique confusing.
Method 3: Digital Insertion — You can place a finger into your vagina and squeeze as if you’re trying to hold in urine. A feeling of tightness around your finger indicates you’re squeezing the correct pelvic floor muscles.
Important Note: Don’t make a habit of starting and stopping your urine stream during actual urination, as this can prevent your bladder from emptying completely and increase your risk of urinary tract infections.
Proper Technique for Kegel Exercises
Performing Kegels correctly is crucial for achieving results. Improper technique means you’re not effectively strengthening your pelvic floor muscles, and you may even experience discomfort or lack of improvement.
Step-by-Step Instructions
Step 1: Find Your Position — You can perform Kegels lying down, sitting, or standing. If your pelvic muscles are weak, starting in a lying-down position may be easier. As you gain strength, try sitting and standing positions.
Step 2: Perfect Your Contraction — Imagine you’re sitting on a marble and tighten your pelvic muscles as if lifting the marble upward toward your head. This mental image helps many people understand the correct squeezing motion. Tighten your pelvic floor muscles as tightly as possible.
Step 3: Hold and Release — When starting out, hold the contraction for three seconds, then relax for three seconds. As you build strength and endurance, work up to holding for five seconds and relaxing for five seconds.
Step 4: Maintain Proper Focus — This is critical: focus only on tightening your pelvic floor muscles. Avoid flexing the muscles in your stomach area, thighs, or buttocks. Don’t hold your breath; instead, breathe freely throughout the exercise. When performed correctly, you shouldn’t notice any visible movement of your body—only your pelvic floor muscles should be working.
Step 5: Check Your Form — If your stomach, lower back, or head hurt after doing Kegels, you’re likely holding your breath or clenching the wrong muscles. Stop and reset your technique.
Getting Started: A Beginner’s Schedule
Don’t expect to perform advanced Kegels immediately. Building pelvic floor strength takes time and consistency, just like any other exercise program. Start with what feels manageable and gradually increase your intensity.
Week 1-2 Beginner Routine
Begin with five Kegels that you hold for three seconds each, twice per day. This might seem modest, but it allows your muscles to adapt to the new demands you’re placing on them.
Progressive Routine
As your strength improves, follow this progression:
- Week 3-4: Hold each contraction for four seconds, perform sets of eight, twice daily
- Week 5-6: Hold each contraction for five seconds, perform sets of ten, twice daily
- Week 7+: Hold each contraction for five seconds, relax for five seconds, perform three sets of ten daily
Ideal Goal
Ideally, you should work toward performing 10 Kegels per set (holding and relaxing for five seconds each) and doing three sets per day for a total of 30 daily contractions. This can be distributed throughout your day—morning, afternoon, and evening.
Important: Don’t do too many too soon. Overtraining your pelvic floor muscles can lead to fatigue and reduced effectiveness, and may even worsen your symptoms.
Alternative Kegel Techniques
While standard Kegels are the foundation of pelvic floor training, there are variations that add challenge and target your muscles differently.
Type A: Sustained Contractions
Tighten your pelvic floor muscles as tightly as possible to the count of five, then relax to the count of five. Repeat 30 times daily in three sets of 10 or two sets of 15. As your strength improves, progress to squeezing and relaxing to the count of 10.
Type B: Quick Contractions
Tighten your pelvic floor muscles and relax in quick succession. Repeat 25-50 times daily in two to five sets of 10. These rapid-fire contractions train your muscles to react quickly, which is particularly helpful for preventing leakage during sudden movements like coughing or laughing.
Combination Training
Once you’ve mastered basic Kegels, you can incorporate them into other stretches and exercises, such as cat-cow pose. Remember that the Kegel contraction is the part specifically targeting your pelvic floor, not the yoga pose itself.
When to Expect Results
One of the most common questions women ask is: “How long before I see improvement?” This is where patience becomes essential.
It may take as long as three months to notice an improvement in pelvic floor muscle strength and symptom relief. Some women experience benefits sooner, while others require more time. The key is consistency—you must perform your exercises regularly to see results.
Once you’ve achieved improvement, remember that the benefits continue only as long as you continue your exercise program. Pelvic floor muscles, like all muscles, will weaken if you stop using them. Consider Kegels a lifelong practice, not a temporary solution.
Common Mistakes to Avoid
Many people inadvertently reduce the effectiveness of their Kegel practice by making preventable errors.
- Tensing the wrong muscles: Avoid squeezing your stomach, thighs, or buttocks. Only your pelvic floor should be working.
- Holding your breath: Breathe naturally throughout your exercises.
- Doing too many too soon: Overtraining can lead to muscle fatigue and worsen symptoms.
- Overdoing it: More isn’t better. If you feel pain after doing Kegels, stop and reassess your technique.
- Using the stop-flow method during urination as regular practice: This can prevent complete bladder emptying and increase infection risk.
- Performing Kegels with a catheter in place: Never do this, as it may cause bleeding or bladder muscle spasms.
What Positions Are Best?
There isn’t really a “best” Kegel exercise position—all Kegels are beneficial when performed correctly. The ideal position is whichever feels most comfortable to you and allows you to focus on the correct muscle contraction.
| Position | Advantages | Best For |
|---|---|---|
| Lying Down | Easiest position, minimal muscle strain, good for beginners | Initial learning and very weak muscles |
| Sitting | Mid-level difficulty, can practice discreetly at work or home | Intermediate practice and daily maintenance |
| Standing | Most challenging, builds functional strength for daily activities | Advanced practice and real-world application |
Professional Help and Biofeedback
If you’re having difficulty performing Kegel exercises correctly, don’t hesitate to seek professional guidance. Healthcare providers can offer several resources to help you succeed.
Biofeedback Training
During biofeedback, a healthcare provider inserts a small probe into your vagina and connects it to a monitor. When you perform a Kegel, the monitor shows whether you’re squeezing the correct muscles and how effectively you’re contracting them. This visual feedback helps many women perfect their technique and feel confident they’re exercising properly.
Electrical Stimulation
Electrical stimulation recreates the sensation of what a Kegel exercise should feel like. Your provider sends a small, painless electric current into your pelvic floor muscles, causing them to contract involuntarily. This treatment helps you understand the correct muscle group and builds initial strength. Many women then progress to performing Kegels independently.
A healthcare provider can also create a personalized Kegel exercise plan tailored to your specific needs and symptoms.
Safety Considerations
When performed correctly, Kegel exercises are very safe and carry minimal risk of complications.
No Damage or Side Effects: Properly performed Kegels shouldn’t damage any muscles or cause side effects. However, if you experience pain after doing Kegels, this indicates incorrect technique.
Overtraining Risk: Doing too many Kegel exercises can increase muscle tension or make your symptoms worse. It’s better to do fewer Kegels properly than to perform lots of Kegels incorrectly.
Catheter Precaution: Never perform Kegel exercises with a Foley catheter in place. Doing so may cause bleeding or bladder muscle spasms.
Frequently Asked Questions About Kegel Exercises
Q: Can I do Kegels anywhere?
A: Yes, one of the major advantages of Kegels is that you can perform them discreetly anywhere—at work, in the car, while watching television, or during other daily activities. Since they require no equipment and produce no visible movement, no one will know you’re exercising.
Q: How long does it take to see results?
A: It may take up to three months of consistent practice to notice improvements in symptoms. Some women see results sooner, but patience and consistency are key.
Q: What if I can’t find my pelvic floor muscles?
A: Contact your healthcare provider. They can use biofeedback or electrical stimulation to help you identify and learn to control these muscles.
Q: Can men do Kegels?
A: Yes, men can and should perform pelvic floor exercises. Kegels provide similar benefits for men, including improved bladder control and sexual function.
Q: Is it normal to feel pain when doing Kegels?
A: No. Pain indicates incorrect technique or overtraining. Stop the exercise, reset your technique, and consult your healthcare provider if pain persists.
Q: How often should I do Kegels?
A: Aim for at least three sets per day. As you progress, work toward 10 Kegels per set, holding each for five seconds, performed three times daily.
Conclusion
Kegel exercises are a simple, effective, and cost-free way to strengthen your pelvic floor muscles and prevent embarrassing urinary and fecal leakage. By learning proper technique, starting gradually, and maintaining consistency, you can achieve significant improvements in bladder control and quality of life. Remember that results take time, and the benefits continue only as long as you maintain your exercise routine. If you struggle with the technique or don’t see improvements after three months, consult your healthcare provider for personalized guidance and professional support.
References
- Kegel Exercises for Men: Benefits & How To Do Them — Cleveland Clinic. December 2024. https://my.clevelandclinic.org/health/treatments/22211-kegel-exercises-for-men
- Kegel exercises: A how-to guide for women — Mayo Clinic Staff. November 2023. https://www.mayoclinic.org/healthy-lifestyle/womens-health/in-depth/kegel-exercises/art-20045283
- Kegel Exercises: Benefits, How To & Results — Cleveland Clinic. December 2024. https://my.clevelandclinic.org/health/articles/14611-kegel-exercises
- How and Why To Do Pelvic Floor Exercises — Cleveland Clinic Health. December 2024. https://health.clevelandclinic.org/how-to-do-pelvic-floor-exercises
- Urinary leakage: What are the treatment options? — Cleveland Clinic Journal of Medicine. 2017. https://www.ccjm.org/content/84/2/159
- Kegel Exercises for Women: Benefits and Importance Explained — Gleneagles Hospital Singapore. 2024. https://www.gleneagles.com.sg/health-plus/article/kegel-for-women
Similar Articles


Read full bio of Sneha Tete