Mastering Indirect Ophthalmoscopy: Essential Techniques
Unlock expert strategies to excel in indirect ophthalmoscopy, from setup to advanced retinal exams for precise diagnostics.

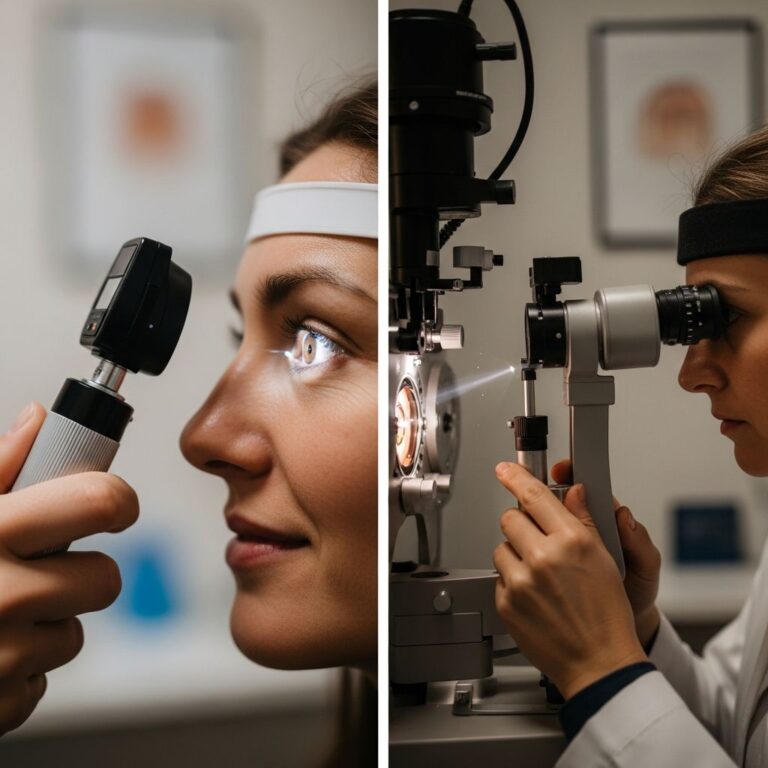
Indirect ophthalmoscopy stands as a cornerstone procedure in eye care, enabling detailed visualization of the retina and peripheral fundus. This binocular method uses a handheld condensing lens and a head-mounted ophthalmoscope to produce an inverted, real image of the posterior eye segment. Unlike direct ophthalmoscopy, it offers a wider field of view and stereopsis, crucial for detecting conditions like retinal tears, detachments, and diabetic retinopathy. Clinicians rely on it for comprehensive fundus assessments, especially in dilated pupils.
Understanding the Fundamentals of Indirect Ophthalmoscopy
The technique combines illumination from the head-borne device with a high-plus power lens, typically 20D, 28D, or 78D, held close to the patient’s eye. The observer aligns their pupils with the device’s optics to capture the red reflex, then adjusts distance for a sharp aerial image. Key advantages include stereoscopic depth perception and the ability to examine through media opacities like vitreous hemorrhage. Proper execution demands practice, as alignment errors can obscure pathology.
- Optical principles: Convex lens creates a virtual inverted image; higher power lenses (e.g., 78D) provide lower magnification but broader fields.
- Clinical utility: Ideal for pediatric exams, undilated pupils, and scleral depression to access ora serrata.
- Limitations: Requires pupil dilation (>4mm) and patient cooperation; glare from small pupils hampers views.
Selecting and Preparing Your Equipment
Choose a reliable binocular indirect ophthalmoscope (BIO) with adjustable pupillary distance (PD), vertical alignment, and light intensity controls. Models from reputable manufacturers ensure consistent beam quality. Begin by donning the headset: loosen coronal and occipital straps, position over eyes, then tighten for stability. Align oculars to your PD by closing one eye at a time while focusing on a distant object—ensure binocular fusion without strain.
| Lens Power | Field of View | Magnification | Best Use Case |
|---|---|---|---|
| 20D | Wide (50°) | 3x | Peripheral retina, surgery |
| 28D | Medium (40°) | 3.5x | General exams |
| 78D | Narrow (30°) | High (10x) | Posterior pole detail |
Calibrate light intensity to 60-80% to minimize Bell’s phenomenon (upward eye deviation from bright light). Select spot size matching pupil diameter: small for <4mm pupils to reduce iris glare; large for fully dilated eyes. Test on your hand at arm’s length for centering.
Optimal Patient Preparation and Positioning
Patient comfort enhances exam success. Explain the procedure, emphasizing brief bright light exposure post-dilation. Recline the patient 45-60 degrees in a slit-lamp chair—this shortens working distances and stabilizes head position. Stand opposite the area of interest: temporal retina from nasal side, periphery by angling body accordingly.
- Head turns: Slight contralateral rotation clears nasal obstructions.
- Tactile cues: Tap cheek for gaze direction instead of verbal commands like “look up and right.”
- Anesthesia: Topical proparacaine eases scleral depression, reducing discomfort.
For supine patients, elevate the head or use a mannequin model for practice. Ensure eyelids are retracted gently to avoid reflex closure.
Step-by-Step Guide to Executing the Exam
With patient dilated and positioned, locate the red reflex from arm’s length by directing the beam into the pupil. Brace your pinky on the patient’s brow or zygoma for stability. Introduce the lens (silver side toward patient) close to the eye, centering the pupil within the optic field. Slowly withdraw to working distance—marked by image inversion and full lens fill. No dioptric focusing needed; adjust only lens position.
- Begin peripherally: Patient gazes up (12 o’clock) to acclimate to light, scanning superonasal retina.
- Progress clockwise: 10, 2, 4, 8 o’clock positions for 360° coverage.
- Central fundus: Direct gaze into light for macular assessment.
- Repeat for contralateral eye, mirroring positions.
Maintain alignment by keeping your forehead against the patient’s. Tilt head 45° for far periphery, elongating the pupil elliptically to accommodate beam and viewing optics.
Advanced Strategies for Peripheral Visualization
Peripheral retina hides detachments and tears. Employ scleral depression: Use thumb or depressor 5mm beyond limbus, patient gazing slightly off-axis (not extreme) to widen pupil aperture. This admits more light and clarifies the indentation “bump.” Stand 180° opposite: nasal periphery from temporal stance.
- Off-axis gaze: 10-20° deviation maximizes illumination over extreme positions.
- Head tilt: Observer tilts to match elliptical pupil shape.
- Lens adjustment: 20D lens farther from eye for wider fields.
Practice on models simulating pathology, like printed fundus photos in a bulb syringe eye replica, to hone skills without patient fatigue.
Overcoming Common Obstacles
Challenges include glare, poor reflexes, and patient movement. Mitigate glare by dimming light or using smaller spots. If reflex absent, rule out cataract or undilation. For narrow angles, elevate patient chin or use smaller lenses. Media haze? Higher lenses penetrate better.
| Challenge | Solution |
|---|---|
| Bell’s reflex | Start peripheral, low brightness |
| Nasal obstruction | Patient head turn toward examiner |
| Poor periphery | Scleral depression + off-axis gaze |
| Unsteady image | Pinky brace, recline patient |
Training Tools and Simulation Models
Novices benefit from low-cost simulators. Construct a model eye using a bulb syringe as housing, inserting a 60D lens, adjustable iris, and high-res fundus printout. Vary pathology by swapping images; tape to chair headrest for realistic positioning. These enable unlimited practice of laser simulation and full exams, building muscle memory.
Video tutorials from retina specialists demonstrate live techniques, reinforcing brace positions and gaze cues. Pair with peer feedback during residency rotations.
Clinical Applications and Diagnostic Insights
Indirect ophthalmoscopy detects lattice degeneration, horseshoe tears, and vitreoretinal traction. In emergencies, it confirms rhegmatogenous detachments via dynamic exams. Pediatric use with smaller lenses suits smaller eyes. Integrate with OCT for multimodal assessment.
Frequently Asked Questions (FAQs)
What is the ideal pupil size for indirect ophthalmoscopy?
Pupils over 4-5mm post-mydriasis yield optimal views; smaller pupils require small spot sizes to minimize glare.
Can indirect be performed without dilation?
Limited to posterior pole; periphery demands dilation for adequate illumination.
How does lens power affect the exam?
Higher power (78D) magnifies center but narrows field; lower (20D) widens periphery at reduced detail.
Is scleral depression painful?
Minimized with anesthesia; patients tolerate well when gazing slightly off-axis.
What if no red reflex is seen?
Check alignment, dilation, and media clarity; advance lens closer or switch to direct method.
References
- Quick Instructions – Binocular Indirect Ophthalmoscopy (BIO) — Indiana University Pressbooks. 2023. https://iu.pressbooks.pub/v680/chapter/quick-instructions-binocular-indirect-ophthalmoscopy-bio/
- How to use the indirect: Key tips and tricks — EyeGuru. 2024. https://eyeguru.org/essentials/indirect-ophthalmoscope-tips/
- A simple eye model for practicing indirect ophthalmoscopy — PMC (PubMed Central). 2019-05-01. https://pmc.ncbi.nlm.nih.gov/articles/PMC6488265/
- Binocular indirect ophthalmoscopy – Keeler USA — Keeler USA. 2022. https://www.keelerusa.com/pub/media/productattachments/files/h/e/headset_bio_advantages_and_usage.pdf
- Direct and Indirect Veterinary Eye and Ear Examination Instructions — Hillrom. 2021. https://www.hillrom.com/content/dam/hillrom-aem/us/en/sap-documents/LIT/80020/80020547LITPDF.pdf
Similar Articles


Read full bio of Sneha Tete